

Connect Canon Printer using WPS, ij.start canon
Description: If your Canon printer has lost its WiFi connection, don't panic; reconnecting it is straightforward with the WPS (Wi-Fi Protected Setup) technique. This approach allows you to set up a secure wireless connection between your Canon printer and router without having to manually input large passwords. It's one of the easiest methods to reactivate your printer and resume printing, scanning, and copying without interruption.

Step-by-Step Guide to Connect Canon Printer Using WPS
Check Router Compatibility.
- Before you begin, ensure your WiFi router supports WPS. You can generally confirm this by looking for a physical WPS button on your router.

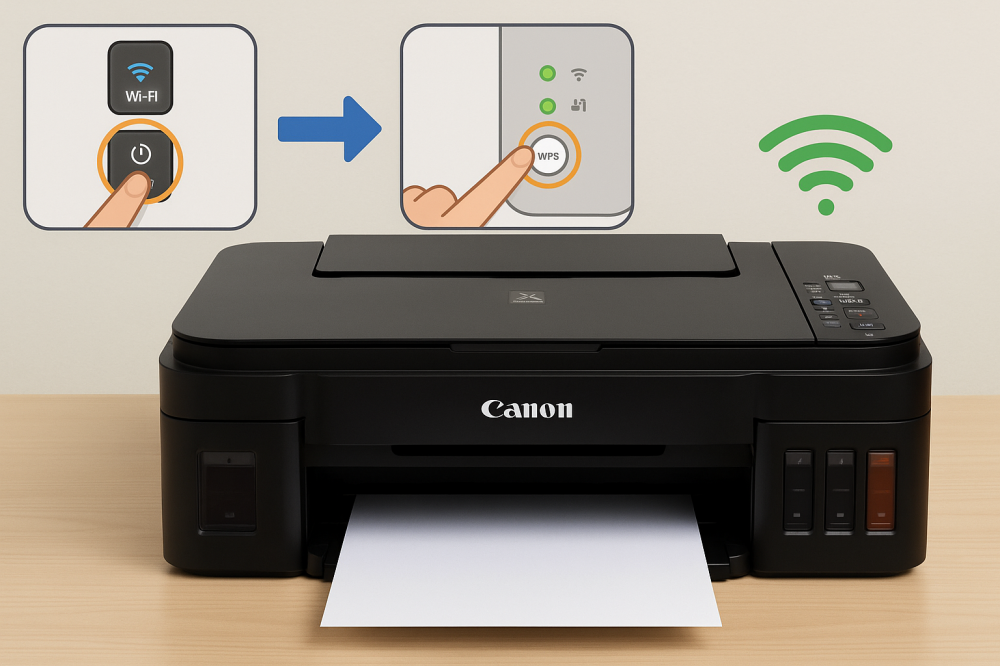
Power on the printer.
- Turn on your Canon printer and make sure it's ready.
Access Wireless Setup.
- On your printer's control panel, push the WiFi button until the wireless lamp flashes. This means that the printer is looking for a connection.
Activate WPS on the router.
- Within two minutes, hit and hold the WPS button on your router. The blue WiFi bulb on the printer will continue to flicker while the connection is formed.
Connection Successful
- Once the printer has connected properly, the WiFi light will remain constant (not flashing). You may now print wirelessly using your devices.
Why Use WPS on Canon Printers?
- The WPS approach removes the need to manually enter network names and passwords, decreasing mistakes and increasing setup speed. It's especially useful for novices who seek a simple approach to get their printers online.
Next Steps: Install Canon Printer Drivers.
- After reconnecting, ensure your computer has the most recent drivers and software installed. To get drivers for your printer model, go to the Canon setup page. This enables seamless operation and access to all printer functions.
By following these instructions, you may rapidly connect a Canon printer with WPS and continue to enjoy wireless printing without interruption. Visit our website to know more about ij.start canon.


