

Painting trim and molding can instantly refresh any room, but when these surfaces are coated in old oil-based paint, the job becomes more detailed. Learning how to paint over oil based paint on trim and molding requires the right prep, precise technique, and patience. Trim is high-visibility work, so every brush stroke shows. The good news is that with proper steps, you can achieve clean, crisp lines and a smooth finish that looks professional.
Below is a complete guide written for homeowners who want sharp, flawless trim without replacing it.
Why Trim and Molding Need Special Attention
Trim and molding are typically coated with oil-based paint because it dries harder and gives a durable finish. But this same hard, glossy shell makes adhesion difficult when painting over it, especially if you’re switching to latex or acrylic. If you want long-lasting results, you must follow the right process for how to paint over oil based paint on these areas.

Because trim is narrow, detailed, and often next to walls, precision is essential. Even a small mistake can show up clearly.
Step 1: Clean the Trim Thoroughly
Dirt, dust, oils, and fingerprints collect on trim more than most surfaces. Before doing anything else, wash the trim with warm water and a mild degreaser. This helps the primer bond properly and prevents future peeling. Dry the surface completely before moving forward.
Step 2: Sand to Remove Gloss
A glossy surface is the biggest challenge when painting over oil-based paint. Your goal is not to strip the trim but simply to remove the shine. Lightly sand using 180–220 grit sandpaper. Scuff the surface evenly, paying extra attention to corners and edges where paint tends to peel first.
Wipe the dust away using a tack cloth to leave a perfectly clean base. This step is non-negotiable if you want a smooth finish.
Step 3: Caulk Gaps and Fill Nail Holes
Trim often has small dents, nail holes, or tiny gaps where it meets the wall. Fill holes with wood filler and sand smooth once dry. Run a thin bead of paintable caulk along gaps to create clean lines and a sealed edge.

This extra prep improves how the paint lays down and makes the final finish look sharp.
Step 4: Apply a High-Adhesion Bonding Primer
The primer is the secret to correctly learning how to paint over oil based paint on trim and molding. You need a bonding primer designed specifically for glossy or previously oil-based surfaces.
Apply one even coat using an angled brush for maximum control. A quality primer blocks stains, grabs the slick surface, and ensures your new paint stays put. Let the primer dry fully before topcoating.
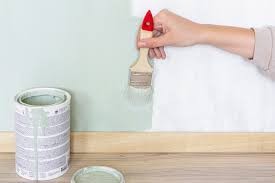
Step 5: Paint with Thin, Even Coats
Trim and molding always look best with thin coats of paint and slow, controlled brush strokes. Use a high-quality angled brush to create crisp edges.
- Apply a thin first coat
- Allow it to dry completely
- Lightly sand with fine grit for a smoother finish
- Apply the second coat
This layering technique prevents drips and creates the smooth professional look most homeowners want.
Step 6: Cut Clean Lines Next to Walls
Trim and molding are always tight to adjacent surfaces, so clean lines matter. To get sharp edges, use high-quality painter’s tape or carefully “cut in” by hand with a steady brush.
Let each coat dry before removing the tape to prevent peeling.
This is a key part of learning how to paint over oil based paint around detailed trim areas without leaving wavy or uneven edges.
Common Mistakes to Avoid
Many DIY painters damage their finish without realizing it. Avoid:
- Painting without sanding
- Skipping primer
- Using a cheap brush that leaves streaks
- Applying thick coats that cause runs
- Rushing dry times
Trim reveals every flaw, so slow and steady wins every time.
When to Hire a Professional
Trim is one of the most visible parts of a home. Uneven brush lines, drips, and rough edges stand out immediately. If your trim has delicate details or you want a flawless finish, hiring a professional san diego painter may save you time and frustration.
At San Diego Custom Painting, we work on all types of detailed woodwork and know exactly how to paint over oil based paint efficiently and cleanly. Our team uses professional primers, precision tools, and careful techniques to create crisp, clean lines on every project.
Final Thoughts
Learning how to paint over oil based paint on trim and molding allows you to modernize your interior without replacing the woodwork. With careful cleaning, sanding, priming, and painting, you can achieve a fresh, smooth look that stands out beautifully.
For homeowners who want perfection without the work, San Diego Custom Painting delivers clean lines, durable finishes, and professional craftsmanship every time.


